1. Lesson Objectives: Know what is included in Matatalab Coding Set; know how to pair; understand the various coding blocks; understand how to place coding blocks and finally how to start coding.
2. Time: 30 mins
3. Language: English
4. Format: Completely Online
5. Level: Beginner
Unit List:
1. Introduction
2. What's Included
3. Coding Blocks
4. Get Started Quickly
5. Practice
6. Q&A
Unit 1. Introduction
Matatalab Coding Set is an Entry-Level Hands-on Coding Robot Set for kids aged 4-9. Lets kids develop the necessary cognitive abilities and learn coding skills from a young age. Kids use their imagination to create infinite possibilities using coding blocks, by controlling a robot car through coding algorithms. Kids receive instant feedback, and quickly learn that coding is simple.
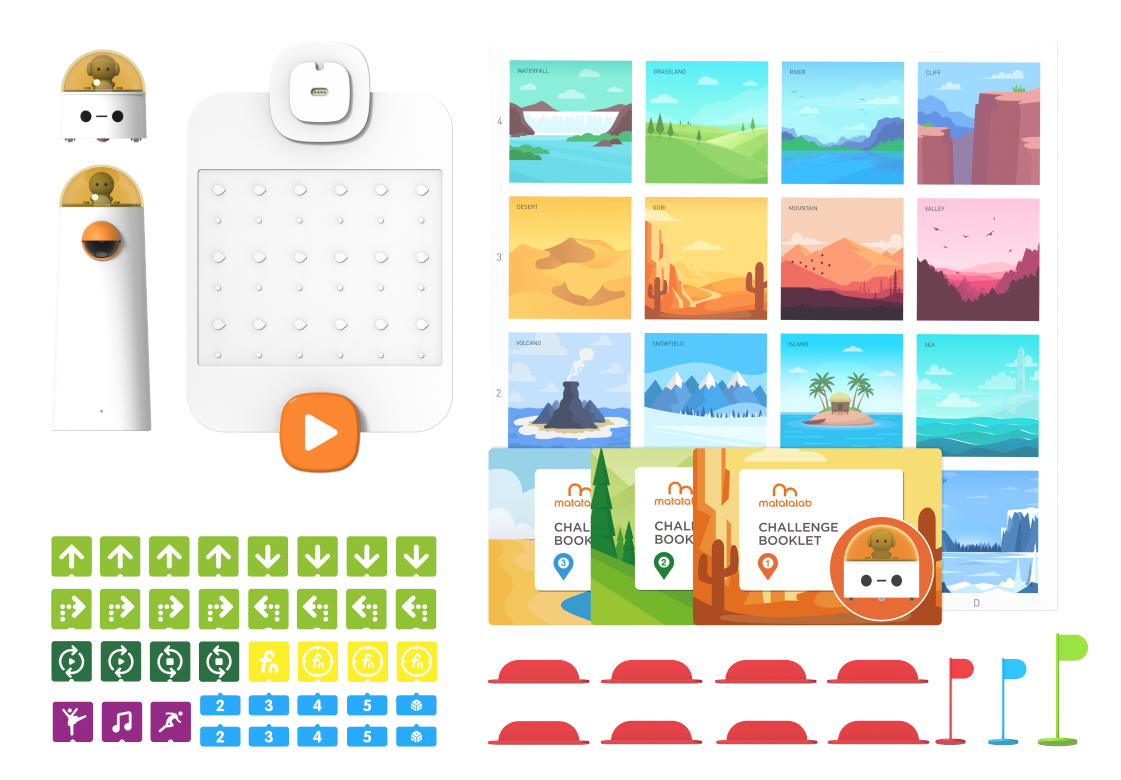
Unit 2. What's included
In Matatalab Lite, these are included:
2.1 MatataBot
2.2 Command Tower
2.3 Control Board
2.4 Nature Map
2.5 Challenge Booklets
2.6 Coding Blocks
2.7 Obstacles
2.8 Flags
2.9 USB-C Charger

Unit 3. Coding Blocks
Coding blocks are the main components of Matatalab Coding Set. There are 5 kinds of coding blocks in Matatalab Coding Set which are:
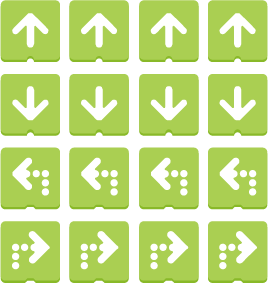
3.1 Motion Coding Blocks:
There are 16 Motion coding blocks in total: 4 Move Forward coding blocks, 4 Move Backward coding blocks, 4 Left Turn 90°, and Right Turn 90°. Placing them on a Control Board can make MatataBot complete some directional movements.
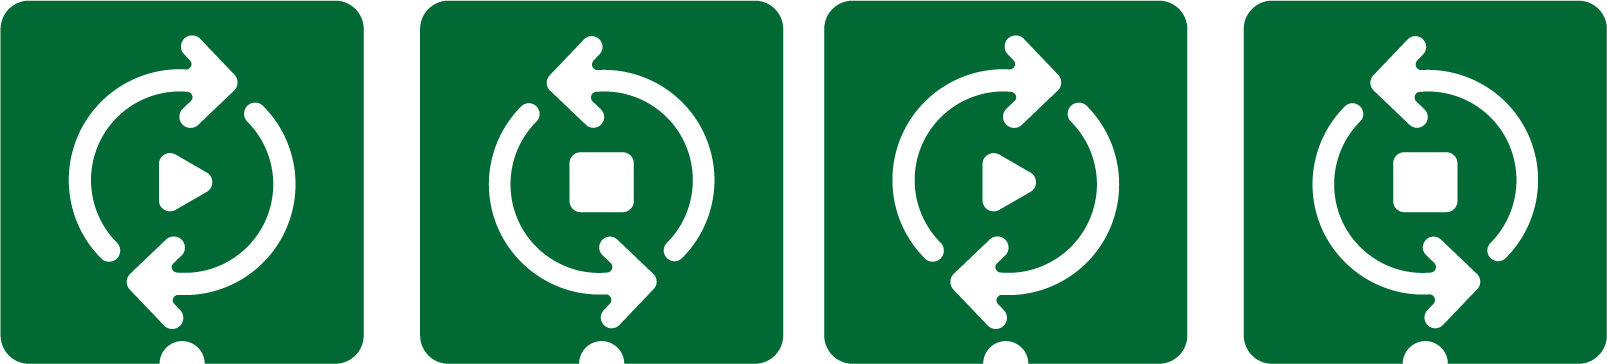
3.2 Loop Coding Blocks:
There 4 Loop coding blocks in total: 2 Loop Begins coding blocks, and 2 Loop Ends coding blocks. Placing them on a Control Board can make MatataBot complete some directional movements.
3.3 Function Coding Blocks:
There are 4 Function coding blocks in total: 1 Define Function coding blocks, and 3 Call Function coding blocks. Placing the Define Function coding blocks on the Control Board with other coding blocks can define a function while using the Call Function coding blocks can make MatataBot call this function when the need arises.

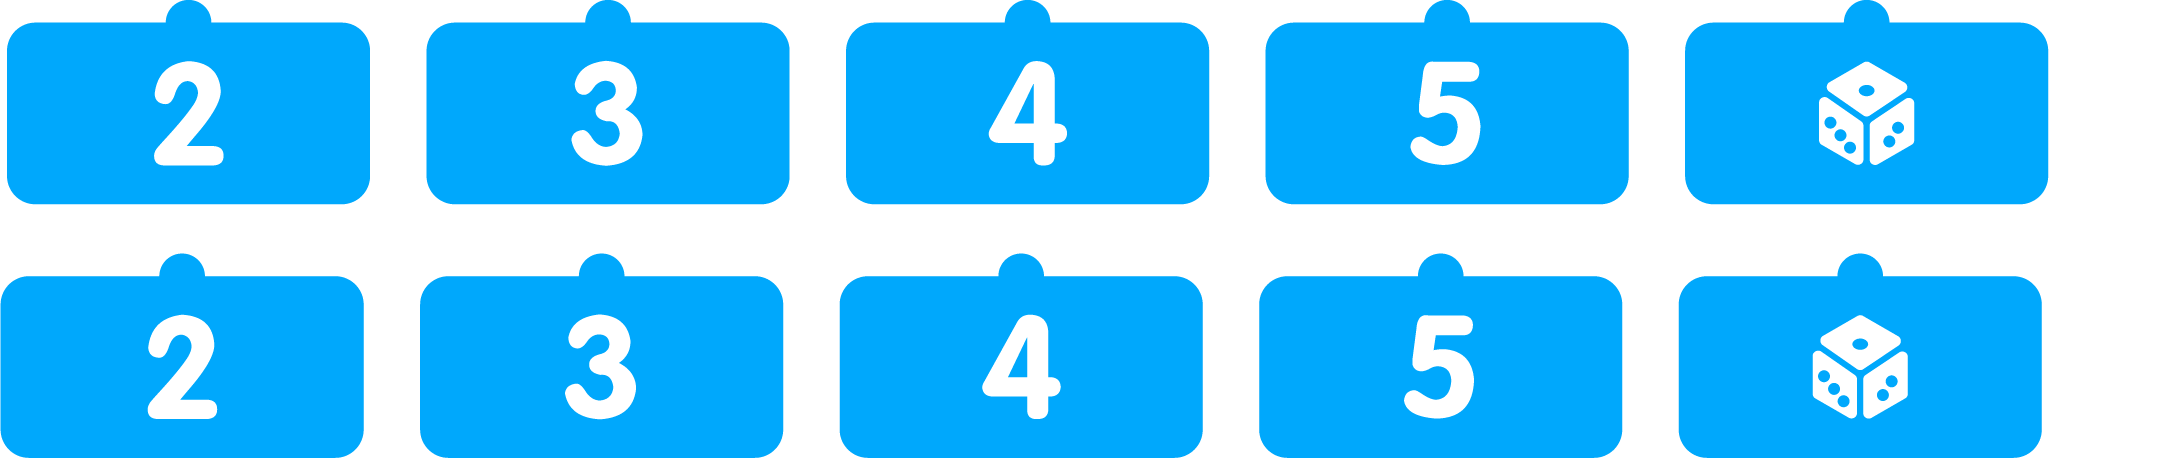
3.4 Number Coding Blocks:
There are 10 number coding blocks: 2 Number 2, Number 3, Number 4, Number 5, and Random Number (1-6). Placing them on the Control Board with other coding blocks can be used as a parameter.
3.5 Fun Coding Blocks:
There are 3 Fun coding blocks: Random Movement coding blocks, Preset Music coding blocks, Preset Dancing coding blocks. Random Movement coding blocks can make MatataBot move at random. Preset Music coding blocks can make MatataBot play preset music randomly. Preset Dancing coding blocks can make MatataBot perform preset dance movements randomly.

Unit 4. Get Started Quickly
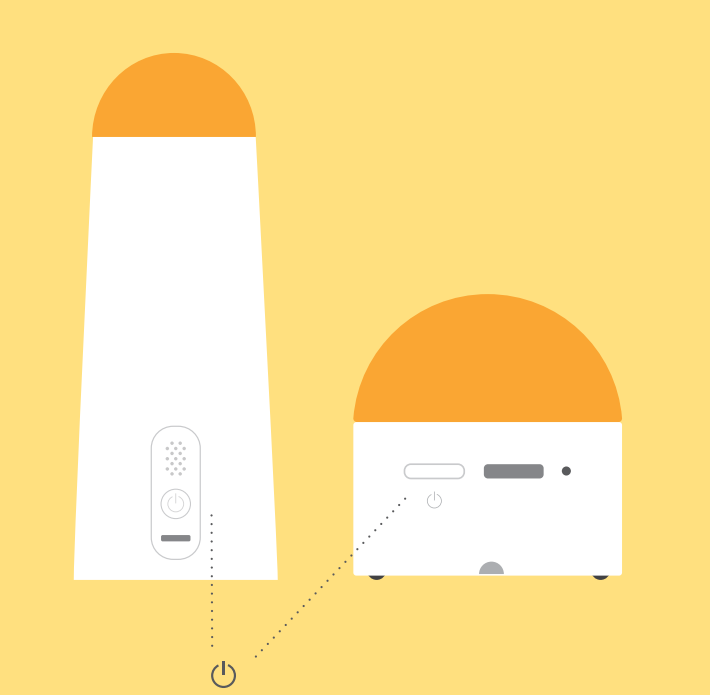
4.1 How to pair:
Press and hold the power button for 2 seconds to turn on the MatatatBot and Command Tower. Pairing is successful when the prompt sound is heard. After a successful pairing, the blue lights of the MatataBot and Command Tower will stay on.
4.2 Control Board and Command Tower:
Correctly place the Command Tower on the port of the Control Board to connect them:
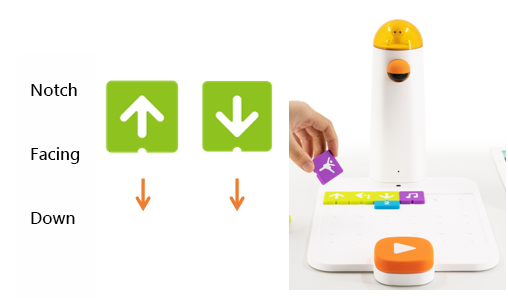
4.3 Coding Blocks Placement:
There is one important note when placing coding blocks on the Control Board: make the notch face down. After placing the coding blocks, press the start button so that MatataBot will execute its commands.

Unit 5. Practice
You can practice if you own a MatataBot Coding Set. If you do not have one, please use the window below to complete a practice.
Unit 6. Q&A
Q1: How to charge MatataBot and the Command Tower?
A1: Charge both the MatataBot and the Command Tower through the USB-C charging cable (A charging cable is included in the box, or use the common USB-C mobile phone charging cable to charge the two components at the same time).
Q2: When should I charge the MatataBot and the Command Tower? How long it will take?
A2: The blue light flashes quickly when the MatataBot or Command Tower power is low; the red light is always on during charging; the green light is always on when fully charged. The MatataBot charges for 1.5 hours and its working time is 5 hours; the Command Tower charges for 3.5 hours, and its working time is 5 hours.
Q3: How are they re-paired?
A3: Quickly press the power button on the Command Tower three times. The Command Tower will launch the Bluetooth re-pairing mode, and it will quickly flash the blue light. · The sound "Ding", indicates that the Command Tower and the MatataBot have been successfully paired, and the indicator lights of both become blue.
Q4: What age is suitable for kids to use Matatalab products?
A4: Matatalab educational robot is designed for children from 3-9 years old. It is a very friendly programming enlightenment education product for children. It is suitable for kids from kindergarten to elementary school age.
Q5: Do children need to master programming in order to use Matatalab robots?
A5: No, children do not need any programming or reading knowledge.
Copyright © 2023 MATATALAB CO., LTD. All Rights Reserved